Loading a Data Warehouse Dimension with RabbitMQ and SSIS
In this post I’m going to take a break from the actual development of custom components for SSIS and show how the RabbitMQ Source that I have created so far could be used in an ETL package to load a data warehouse.
The Scenario
The scenario for this post is a company that sells cool stuff over the internet, they have a website where people can signup and registered users can place orders.
The way this imaginary system works:
- When a user signs up, their details are created in the operational database which is used by the website. After creation their details are then sent to RabbitMQ
- When a user updates their details, they are updated in the operational database, this information is also sent to RabbitMQ
- When a user places an order, the details are sent to two different RabbitMQ queues for processing:
- An imaginary process writes these details into the operational database in “real-time”
- An ETL process runs periodically to load the orders into the data warehouse
In this post I’m going to show how the customer dimension can be loaded from the RabbitMQ queue, in a future post I will show how to load the fact table via SSIS.
My ETL package will do the following:
- Read from a queue of customers, parse the xml and populate attribute columns
- Using the SCD (slowly changing dimension) component to populate the customer dimension
Preparing the solution
The only preparation I did before starting was to create a new database with a new table DimCustomer
|
|
Creating the ETL Package
The ETL Package is going to have a number of different steps that it goes through.
- Retrieve customer messages from queue
- Parse XML
- Load customers into the dimension, accounting for SCD attributes
The end result ended up looking like this:
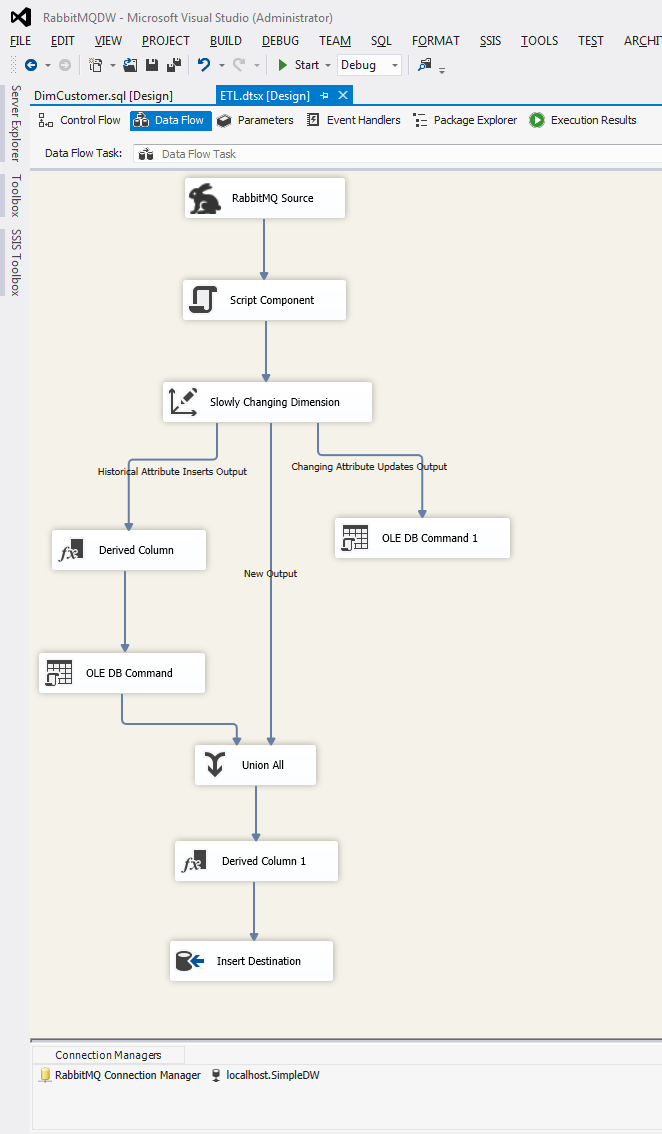
Building the package is actually very straightforward. After creating a new solution and adding a new package, I added a new data flow task.
To the data flow task, I first added the RabbitMQ Source and configured it with a new RabbitMQ Connection manager to my local broker, I also told it to use the customer queue.
Next I added a script component, this is where the xml message from RabbitMQ will be parsed.
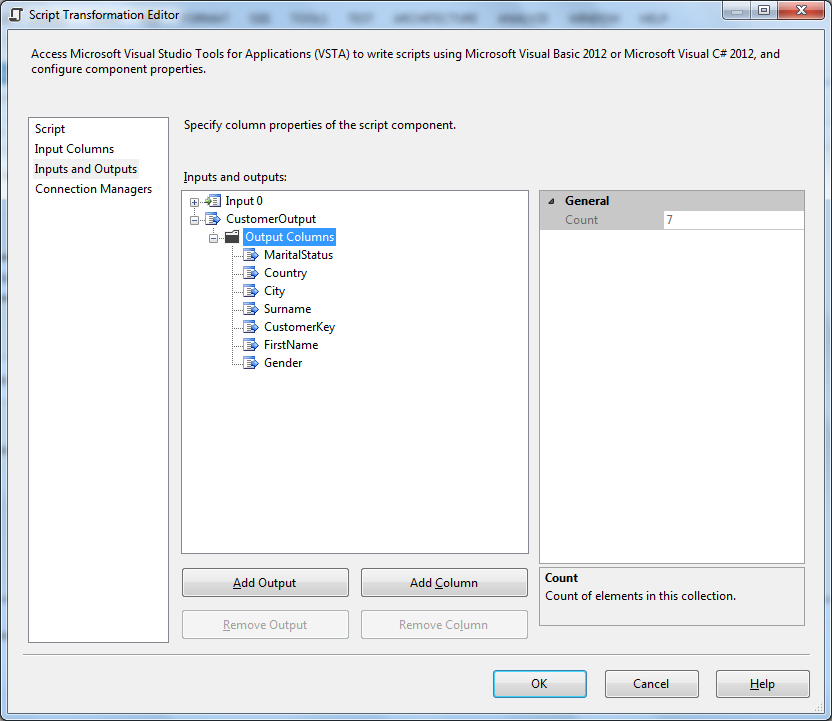
The script component is the key to making the messages in RabbitMQ understood in the SSIS package. What the script does is it takes in each of the messages and then updates rows in a new output buffer. This output buffer contains columns corresponding to the elements in the xml message.
The XML messages that are published look like this:
|
|
To configure the Script component, first add a new output then add each of the fields from the xml above.
Next edit the script itself and updated the Input0_ProcessInputRow method:
|
|
That is it for the script component, the next step is to drag in the Slowly Changing Dimension component. After connecting the script component to the slowly changing dimension component, double clicking will bring up the Slowly Changing Dimension Wizard.
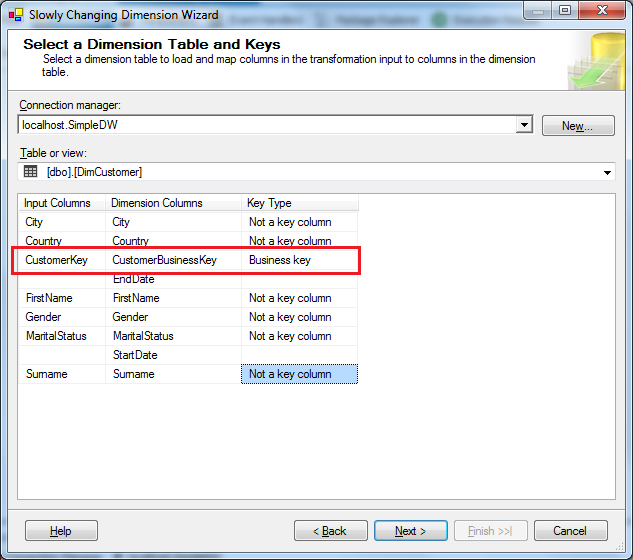
The first page of the wizard is where you configure the connection and table of the dimension, after doing that the wizard will attempt to match the different columns in the table to columns from the input into the component. The next step on this page is to select which column is the business key.
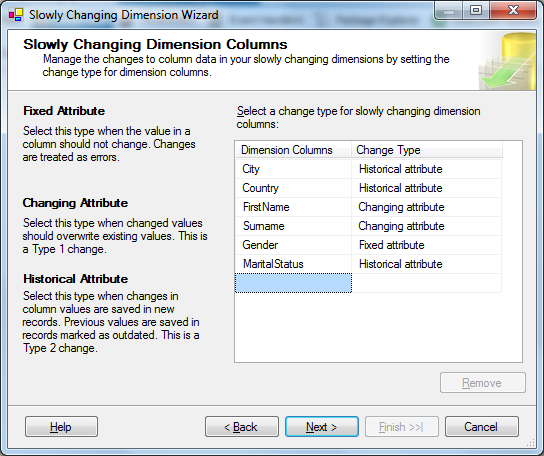
The next page is where the SCD types are set for the columns. Historical is SCD Type 2, Changing is SCD Type 1 and Fixed is SCD Type 0.
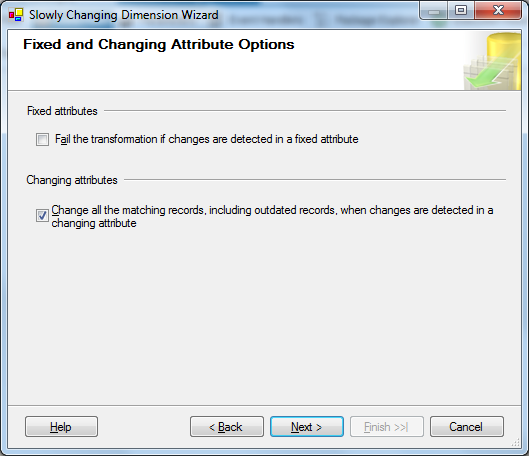
In the next page you can configure how SSIS should deal with different scenarios, below you can see that I’ve opted not to fail the package if fixed attributes change, and ticked the second option.
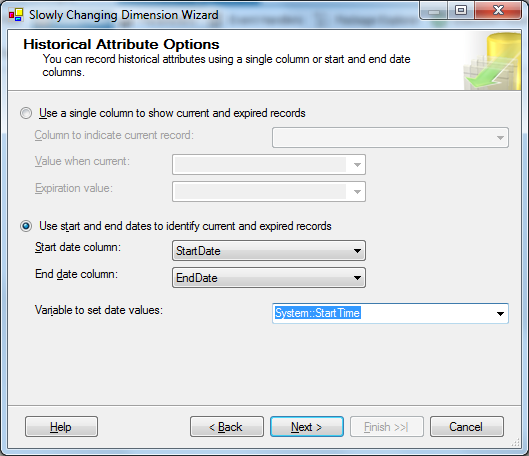
The next page is used to configure how Type 2 dimensions should be stored in the dimension table, so that they can be recognized.
The wizard gives us two options:
- Use a status column, the first wizard option, whereby a column can be selected as the indicator column then two values can be selected which correspond to the current or expired flag
- Use start/end date columns, the second wizard option, for this option two datetime columns need to be selected and then set what value to use for the date value
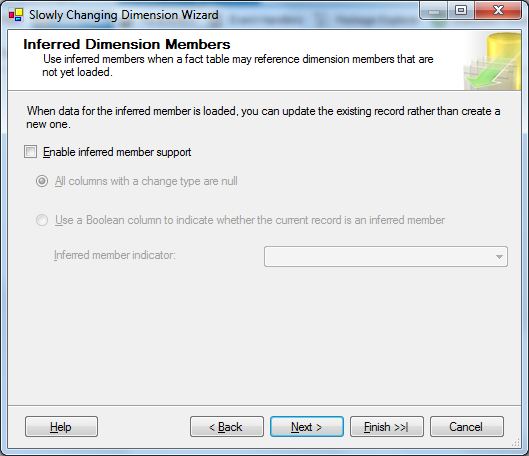
The next page gives the option to enable interred member support, outside the scope of this article. I have left this turned off.
After clicking Finish, the wizard will close and the remaining elements, that you can see in the picture of the complete package above, will be added.
Running the package
To demonstrate the package, I’m going to using the RabbitMQ management interface put some messages into the queue and then run the package.
The first message I’m placing into the queue is this:
|
|
This is the xml sample from above. After running the package I can query the database and get the following output
The next two messages I’m putting in are:
|
|
and
|
|
The first is an update to Peter Parker, the second is a new customer. After running the package the output from the table is now this:
You can see that the package has identified that Peter Parker is an existing customer, so expires the old dimension and adds a new one, it also adds a new row for Clarke Kent.
Summary
As you can see using the RabbitMQ source itself is very easy, and thanks to some of the pre-built components in SSIS, building a package that loads dimensions into a data warehouse is very easy.
I’m going to be taking a break from blogging about Custom SSIS Components and start a new series on building a real-time monitoring system with StreamInsight.


🍪 I use Disqus for comments
Because Disqus requires cookies this site doesn't automatically load comments.
I don't mind about cookies - Show me the comments from now on (and set a cookie to remember my preference)