Part 4 - Add a Custom UI to the RabbitMQ Source
A lot of the content in this article is similar to what I did in Part 2, so if you haven’t read it I suggest you go back and read it now :)
The next part of this series will take a look at implementing a custom UI for configuration of the RabbitMQ Source component. The main reference for this entry can be found on MSDN.
A shout out and my thanks goes to Tillmann Eitelberg (Web | Twitter) who pointed me in the right direction when I was trying to figure out how to get a list of all the connection managers in a package. Thanks!
Preparing the Project
To get my project ready I added two new files to the RabbitMQSource project. The first was an empty class file called RabbitMQSourceUI.cs and the second was a Windows Forms class called RabbitMQSourceUIForm.cs.
Then the DtsPipelineComponent attribute on the RabbitMQSource class needs to have the UITypeName property set. This indicates to SSDT BI that the custom source has a user interface for configuration. Just like in Part 2, the UITypeName property is the fully qualified type name of the RabbitMQSourceUI class. (See Part 2 for details on how the fully qualified type name is constructed).
The DtsPipelineComponent attribute, after setting the UITypeName property looks like this:
|
|
Creating the Custom UI
Open the RabbitMQSourceUI file and have the class implement the IDtsComponentUI interface.
Similar to what I did for the RabbitMQ Connection Manager UI, I’m only implementing some of the methods.
The Initialize and New methods are called when the RabbitMQ Source component is first created. In the Initialize method below, I’m storing the service provider and meta data objects that were passed through, into class variables. These will then be passed through to the Form and used to update the RabbitMQ Source component as well as the package.
|
|
The New method is called right after Initialize and it just displays the form.
|
|
The ShowForm method is used by both the New and Edit methods.
|
|
The Edit method is called when the user double clicks on the component, or right clicks and selects “Edit”.
|
|
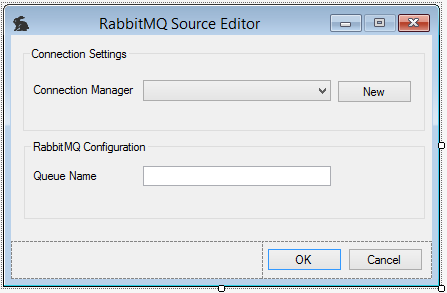
The next step is to design the user interface. After adding various UI elements to the RabbitMQUIForm, I ended up with a design that looks like this:
All the code is available on GitHub if you’re interested in seeing how the Form was put together.
The next step is to add some methods in the form class.
In the constructor I am storing the service provider and meta data that were passed through, as well as getting an instance of the IDtsConnectionService (line 6) and an instance of CManagedComponentWrapper (line 7).
|
|
The connection manager service exposes the connection managers that have already been created in the package, it also provides a number of methods to create new connection managers.
In the RabbitMQSourceUI_Load method below, I am using the connection manager service to retrieve a list of all connection managers, check if they are RabbitMQConnectionManagers then populating the connections combo box. This will let the user select which connection manager to use for the source.
It will also preselect the connection manager currently assigned to the source if there is one and sets the queue name textbox value to the QueueName property if it has been set. This is useful when editing the source.
|
|
ConnectionManagerItem is a custom class which I created to populate the combo box - see GitHub source for details.
When the user clicks the OK button two things need to happen, first the Queue Name property needs to be set to what is on the form, and second the selected connection manager needs to be associated with the connection manager defined in the component.
|
|
If you read part 3, then you will hopefully remember what I said about having to hard code the ConnectionManagerID property in the ProvideComponentProperties method, this snippet of code above now fixes this issue of hard code values :)
Having used SSIS for sometime now, I appreciate that there is a New button on most source components to create a new connection manager, this streamlines the process of creating sources. So I thought I should also provide the users of my component with the same feature.
In the method below you can see that I am using the connection service to create a new connection, the type is RABBITMQ and this matches up with ConnectionType in the DtsConnection attribute on the RabbiMQConnectionManager class that was created in part 1. What is really nice is that since I implemented a custom UI to configure the RabbitMQ connection manager, it is displayed to the user as soon as they click the New button on the form. This is all done by SSDT BI when the CreateConnection method on the connection service is called. So easy.
The MSDN documentation says it returns an ArrayList which holds all the connections that were created, if the user cancels the creation then it will return an empty list. As far a I can tell it should only return one item in the list.
|
|
Adding an Icon
In the screenshots below you will see an icon on the RabbitMQ Source component. To get the icon to show up, I added an ico file to my project then set the Build Action to “Embedded Resource”.
The only other thing left to do is update the DtsPipelineComponent attribute on the RabbitMQSource class. After setting the IconResource property this now looks like:
|
|
What it looks like
Now time to see how this makes configuration a much easier experience!
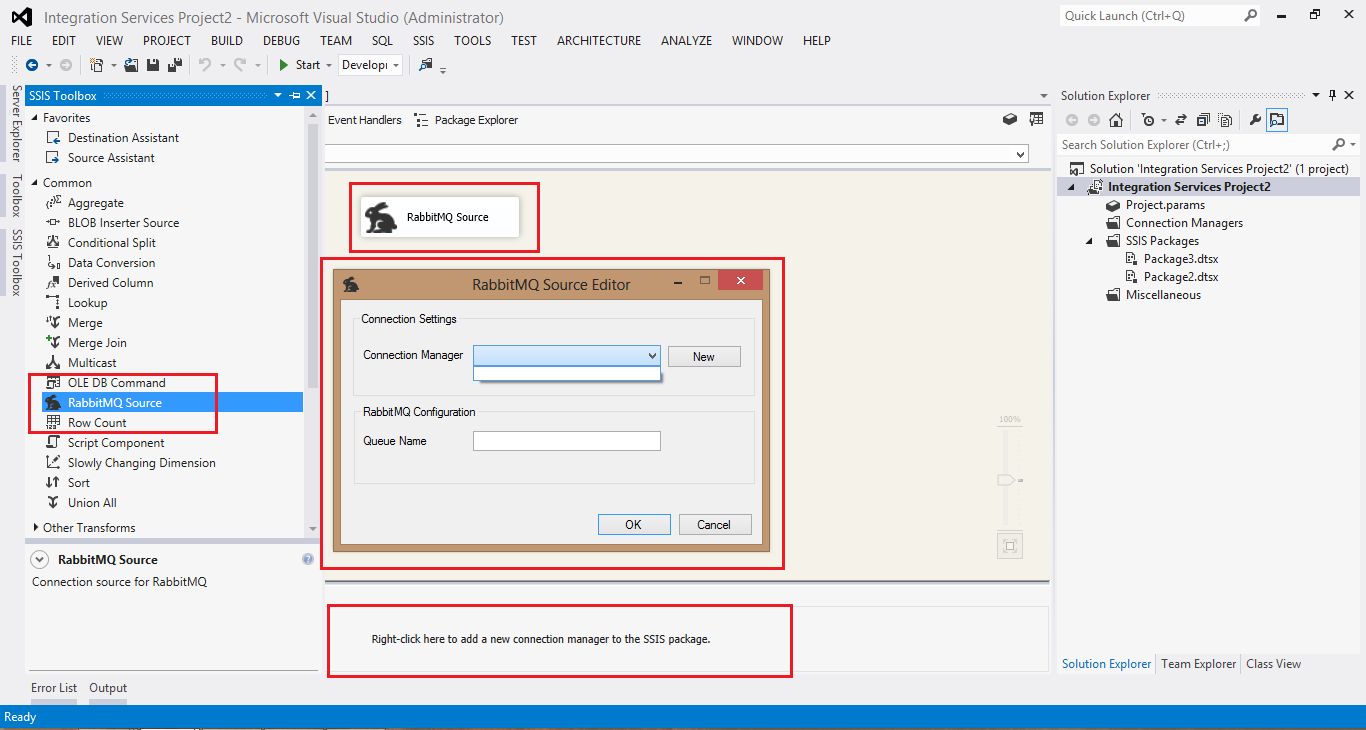
The below screenshot shows what the user see when they first add a RabbitMQ Source to a data flow task, the dialog box is displayed straightaway.
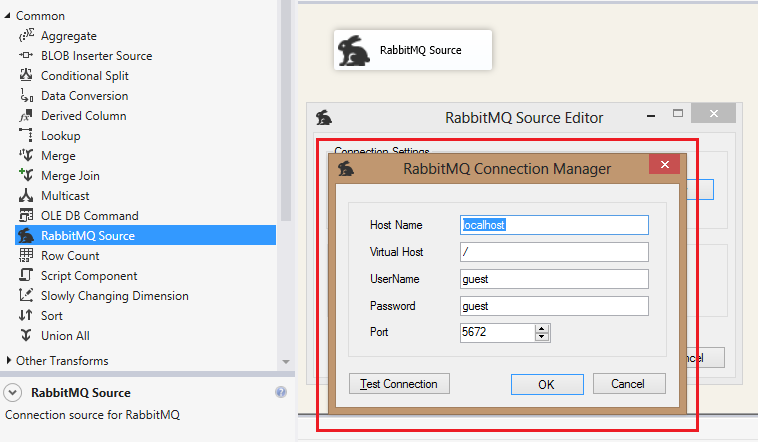
After clicking the New button, the dialog box created in part 2 is displayed for the user to setup the RabbitMQ Connection Manager
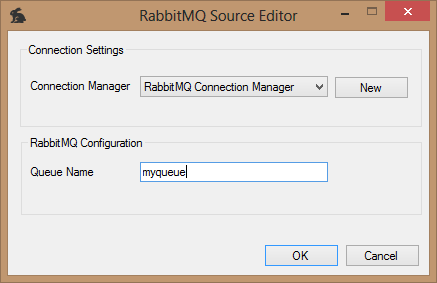
After clicking OK for the connection manager to be created you see that it appears in the drop down.
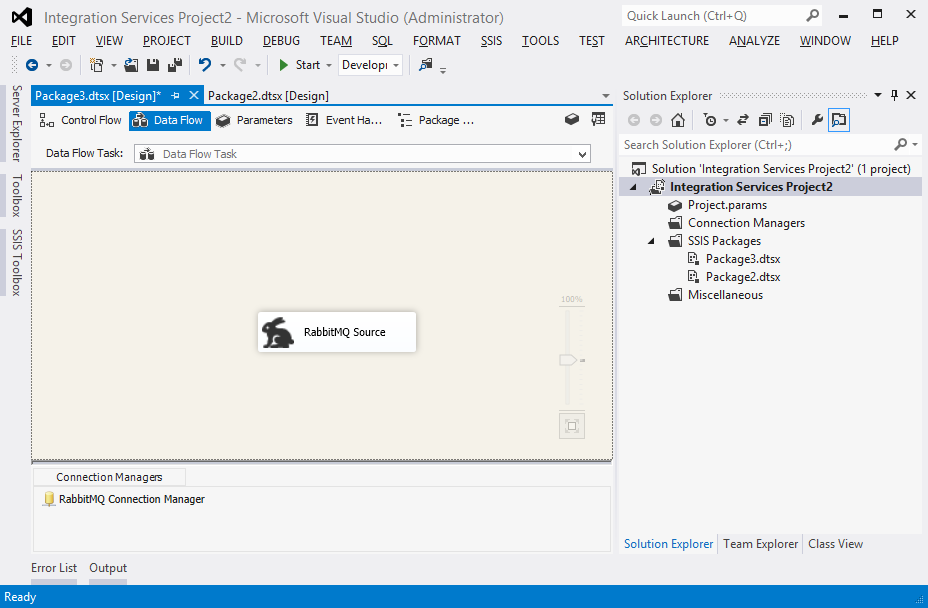
Finally, after clicking OK for the source to be created you can see that the source has passed validation, and that a RabbitMQ Connection Manager has been created - note that this no longer needs to be called “RabbitMQ”.
Up next I’m going to take a short break from the development side of things and show how the RabbitMQ Source that has so far been developed could be used to load a fictional data warehouse.
🍪 I use Disqus for comments
Because Disqus requires cookies this site doesn't automatically load comments.
I don't mind about cookies - Show me the comments from now on (and set a cookie to remember my preference)